

News
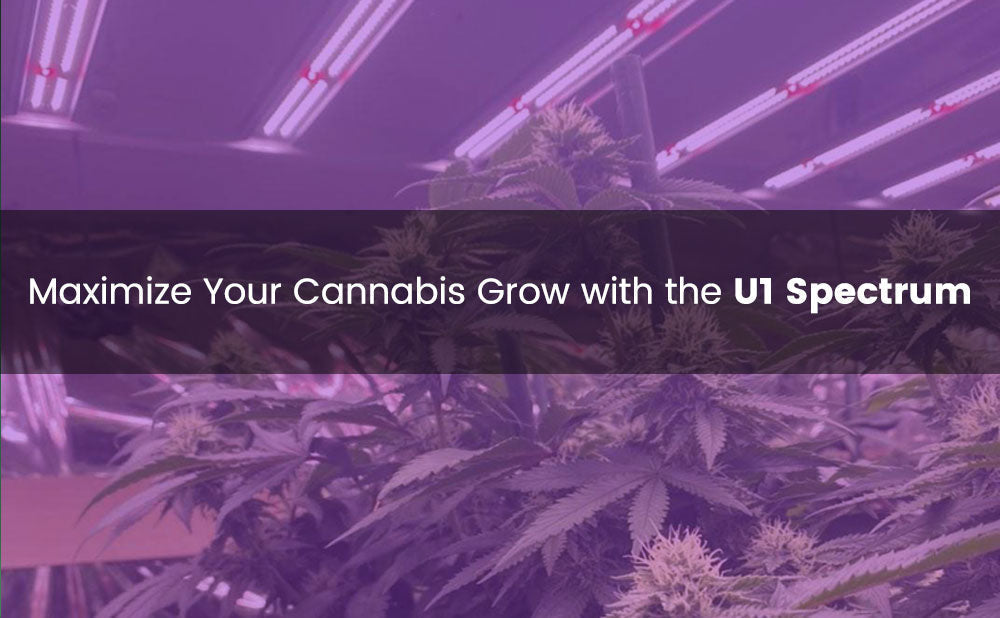
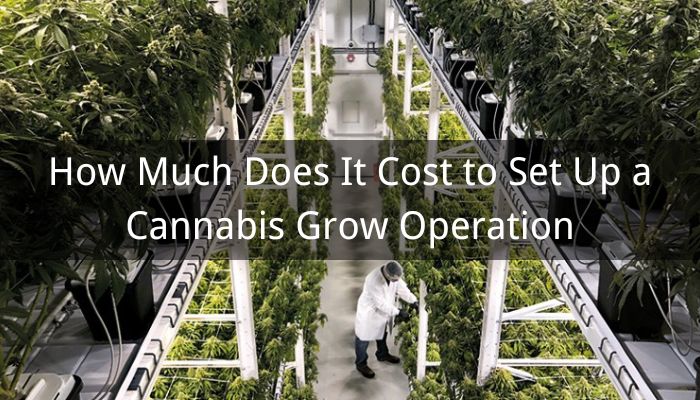
How Much Does It Cost to Set Up a Cannabis Grow Operation
In 2024, regulated cannabis sales in the United States are projected to exceed $31.4 billion, with forecasts for 2025 predicting sales surpassing $35.2 billion. As more states move toward cannabis legalization, these numbers continue to climb, drawing many Americans into this lucrative gold rush. But how much does it cost to grow cannabis? What equipment is required? What are the monthly expenses? More importantly, how much can you earn from growing cannabis, and how long does it take to break even? These are critical questions that every grower must carefully consider. In this article, Medic Grow will provide an in-depth analysis of the capital and equipment needed to establish a large-scale cannabis cultivation facility. Our goal is to help you gain a clear understanding of the cannabis growing industry, create a solid cultivation plan, and attract potential investors to your venture. Table of Contents Cost of Equipment for Grow Operation Total Startup Costs Rebate Programs and Operating Costs How Long Does It Take to Break Even Conclusion Cost of Equipment for Grow Operation Starting a large-scale indoor cultivation operation is no easy task. From building design to security systems, each component requires careful planning and investment. Below is an estimated cost breakdown for the necessary equipment and setup advice for cannabis cultivation. Building Design and Renovation Building design and renovation is the first step in setting up a cultivation facility. Professional architects and engineers can optimize the layout while ensuring compliance with electrical and fire safety regulations. Associated costs primarily include building permits, material expenses, and construction costs. Cost Range: $50,000-$500,000 (depending on building size and complexity of renovation) Infrastructure Renovation: Includes waterproofing, insulation, and electrical system upgrades, typically accounting for 20%-30% of the total cost. Professional Design Fees: Hiring architects and engineers costs between $5,000-$30,000. Permits and Inspections: Around $1,000-$10,000, depending on local regulatory requirements. Leasing a Facility Leasing is another more economical option, but not all spaces are suitable for cannabis cultivation. Priority should be given to warehouses or industrial buildings with good infrastructure, as these typically offer ample space and power capacity. Site selection should consider the target market to reduce logistics costs while ensuring compliance with local cultivation regulations. Cost Range: $2,000-$20,000/month (depending on location and size) Suitable Locations: Warehouses or industrial parks are ideal, as they often have adequate power and water supply. Deposit and Renovation Costs: The initial deposit is typically 1-3 months’ rent, with renovation costs around $10,000-$50,000. Contract: When signing a lease, it's important to clearly outline terms that allow modifications, as well as responsibilities for water supply, electricity, and security. HVAC Equipment (Heating, Ventilation, and Air Conditioning) The HVAC system is a crucial component in cannabis cultivation. It should effectively regulate temperature (20°C-30°C) and humidity (40%-70%), while also providing air purification to prevent mold and pests. Choosing an energy-efficient system can significantly reduce long-term operating costs. Cost Range: $25,000-$250,000 Equipment Costs: A high-efficiency HVAC system typically costs between $15,000-$100,000, depending on the size and functionality. Installation Costs: Typically 20%-30% of the equipment price. Operating Costs: Monthly energy costs range from $1,000 to $10,000. Indoor Climate Control and Automation Modern cultivation facilities rely on intelligent systems to maintain stable environmental conditions. These systems automatically adjust environmental parameters through sensors that monitor temperature, humidity, CO₂ levels, and light intensity and software that controls equipment. Cost Range: $10,000-$50,000 Sensors and Monitoring Systems: Each set costs between $5,000-$15,000, used for monitoring parameters such as temperature, humidity, and CO₂ levels. Automation Control Systems: $5,000-$20,000, supporting remote monitoring and adjustments. Grow Light System Cannabis demands high light intensity and spectrum, making an appropriate lighting system essential for successful cultivation. LED grow lights are energy-efficient, have adjustable spectra, and are ideal for large-scale use. Additionally, through Medic Grow's professional Rebate service, the cost of the lighting system can be significantly reduced. Cost Range: $50,000-$300,000 LED Grow Lights: Each light costs between $500-$1,500, and typically, hundreds of lights are required. (Rebates can significantly reduce the cost.) Installation and Electrical Upgrades: $5,000-$30,000. Growing Racks A well-designed growing rack can greatly improve space utilization and yield. Multi-tiered racks are suitable for vertical farming, allowing increased planting area in limited space. The materials should be moisture-resistant and corrosion-proof to extend the lifespan, while the height should be adjustable to accommodate plants at different growth stages. Cost Range: $10,000-$100,000 Multi-tiered Growing Racks: Each set costs between $500-$2,000, depending on size and material. Custom Rack Design: Customized racks based on site requirements typically cost $5,000-$20,000 per set. Irrigation System An efficient irrigation system can reduce labor costs and ensure plant health. Drip irrigation systems deliver precise amounts of water to each plant through pipes, while automated irrigation adjusts the water supply in real time based on soil moisture. Equipped with water treatment systems, such as reverse osmosis filters, impurities are removed to ensure water quality is suitable for plant absorption. Cost Range: $10,000-$50,000 Automated Drip Irrigation System: Approximately $5,000-$15,000 per acre, depending on the pipe layout. Water Treatment Equipment: Reverse osmosis filters cost between $2,000-$10,000. Maintenance Costs: Monthly maintenance costs around $500-$1,000 for cleaning and part replacements. Security System Due to the high value and strict regulation of cannabis, a security system is an essential facility for cultivation operations. Surveillance cameras should cover key areas 24/7, with electronic locks and identity recognition systems to restrict access. The alarm system should integrate fire, theft, and environmental anomaly alerts while ensuring compliance with local regulations. Cost Range: $20,000-$100,000 Surveillance Cameras: Each camera costs between $300-$1,000, with 20-50 cameras needed to cover the cultivation area. Alarm and Access Control System: Each system costs between $5,000-$15,000, including access control and anti-theft functions. Installation and Maintenance Costs: Initial installation costs between $5,000-$10,000, with ongoing maintenance around $1,000 per year. Total Startup Costs The total startup cost for a Grow Operation varies depending on the scale, typically ranging from $850,000 to $2,000,000. For operators, initial investment needs to strike a balance between hardware equipment and long-term operational costs. Prioritizing energy-efficient equipment and leveraging professional advice can make a significant difference. With careful planning and a well-allocated budget, operators can get their projects on a profitable track more quickly. Rebate Programs and Operating Costs Through rebate programs offered by government agencies and utility companies, cultivation operators can significantly reduce the initial investment costs for HVAC systems and grow lights. These rebates typically range from 20%-50% of the equipment cost, and in some cases, can even reach up to 100%, saving operators hundreds of thousands of dollars on their initial setup. Moreover, investing in energy-efficient equipment can lead to substantial savings in monthly electricity costs. Without optimization, HVAC, cannabis nutrients and grow lights can result in monthly operating costs of up to $30,000. However, with high-efficiency systems, monthly costs can be reduced to between $20,300 and $37,000. This not only lowers the initial equipment costs but also saves a considerable amount in ongoing operating expenses, providing a dual benefit for operators. How Long Does It Take to Break Even The break-even period for large-scale indoor cannabis cultivation typically ranges from 12 to 24 months, depending on factors such as initial investment, operating costs, yield, and market prices. Initial investments are usually substantial, including costs for building renovations, equipment purchases, and installations, which can range from $250,000 to $2,000,000. Monthly operating costs typically fall between $10,000 and $50,000, with electricity consumption and facility maintenance being the main expenses. Yield and market prices have a direct impact on the break-even period. The revenue generated from monthly yields and sales prices will determine how quickly the initial investment can be recouped. By utilizing energy-efficient equipment and optimizing management practices, operating costs can be effectively controlled, which accelerates the break-even process. Moreover, as cultivation techniques mature and the market stabilizes, the break-even period continues to shorten. Conclusion In conclusion, establishing a cannabis grow operation requires significant upfront costs. However, through careful planning, and energy-efficient solutions, operators can greatly reduce both initial and ongoing expenses. Moreover, understanding rebate programs helps ensure a smoother path to profitability in the rapidly growing cannabis industry. If you're looking to purchase highly cost-effective LED grow lights and learn more about our rebate services, please click below to contact us via email. We're here to assist you!
Learn more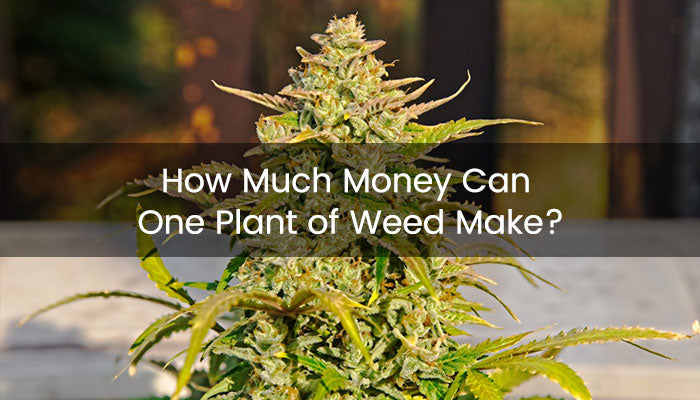
How Much Can One Cannabis Plant Make?
The potential revenue from a single cannabis plant can vary widely based on factors such as yield and quality. Weed Yields can range from a few ounces to over a pound per plant, with prices varying from $140 to $420 per oz depending on quality and THC/CBD content. Consequently, revenue from one weed plant can range from a few hundred to several thousand dollars. For these reasons, many people may wonder how much marijuana is out of one plant and how to maximize profits from indoor weed growing. Today, Medicgrow will guide you through the value of growing marijuana indoors, detailing how to get the most out of it. After a brief overview, you'll be able to determine if growing marijuana indoors is worth your effort. Table of Contents How Much Marijuana is Out of One Plant How Much Is One Weed Plant How Much Is a Pound of Weed How Much Is a Quarter of Weed Maximizing Profits in Indoor Marijuana Cultivation Conclusion FAQ about How Much Can One Weed Make How Much Marijuana is Out of One Plant The average yield LBS of dried flower per THC plant typically ranges from 0.5 to 1.5 pounds (227 to 680 grams) for indoor grows and 2 to 3 pounds (907 to 1360 grams) for outdoor grows. Besides, the yield of marijuana from one plant is influenced by 3 key factors: Strain and Genetics: The strain’s genetic traits determine its potential yield and quality. High-yield strains like Exodus and GSC often produce more than others. Growing Conditions: Indoor plants usually have lower yields due to limited space, whereas outdoor plants benefit from natural light and larger growing areas. Light, Nutrients, and Water: The most important thing for growing cannabis indoors is indoor growing light. Adequate light, proper nutrients, and consistent watering are crucial for maximizing weed plant growth and yield. Apart from that, there are other factors such as marijuana growing techniques, growing methods (hydroponics and quality weed fertilizers), and so on. By reading the third part of this article, you can learn more about the indoor growing cannabis tips to maximize your yield. How Much Is One Weed Plant As we have seen, the value of a marijuana plant mostly depends on the yield and quality, which is variable, here are some references. Indoor cultivation of marijuana typically yields 0.5 to 1.5 pounds of dried marijuana and can earn between $16,00 and $3,200 if it is cheap and of high quality. Outdoor weed plants are generally more productive, yielding between 2 and 5 pounds. High-quality marijuana can yield $4,500 to $7,500 or more. The final profit depends on the cannabis yield and current market conditions, with premium varieties commanding higher prices. In addition to the yield of marijuana, the quality of the marijuana is also important; high-quality marijuana usually contains higher levels of active ingredients (such as THC and CBD) that provide more intense and long-lasting effects. The yield of a marijuana plant using different growing methods and tools varies, so let's check out how much is a pound of weed and how much is a quarter of weed a better mind. How Much Is a Pound of Weed The price of a pound of weed can vary widely depending on several factors, including the location, and quality of the cannabis. As of 2024, in the United States, the price for a pound of weed can range from around $1,000 to $3,000. Low-quality or bulk cannabis: Around $1,000 to $1,500 per pound. Mid-grade cannabis: Typically between $1,500 to $2,500 per pound. High-quality or premium cannabis: Can range from $2,500 to $3,000 or more per pound. Prices can be lower in areas where cannabis is legal and widely available, and higher in areas where it's less accessible. Additionally, fluctuations in the market, such as changes in supply and demand, can also affect the prices of a pound of weed, but what about how much is a quarter of weed? How Much Is a Quarter of Weed A quarter of weed, which is 7 grams, typically costs between $25 and $100, depending on the quality and where you’re buying it. In states with legal cannabis markets, you might find a quarter for as low as $25 to $50 for lower-quality weed, while mid-grade strains usually range from $50 to $75. Premium strains can cost $75 to $100 or more.If you're shopping in a legal state, it’s worth checking out dispensary deals, as many offer discounts for larger purchases or daily specials. Additionally, factors like the strain's potency, freshness, and whether it's organically grown can also impact the price.For first-time buyers, it's a good idea to compare prices across different dispensaries and read reviews to ensure you're getting good quality for your money. We’ve learned the economic value of marijuana. Let's take a look at how to grow marijuana indoors to maximize your profits. Maximizing Profits in Indoor Marijuana Cultivation Growing marijuana indoors is becoming more and more popular as it offers significant advantages. You may be wondering how to grow marijuana indoors for maximum profit, which includes saving money on growing marijuana indoors and maximizing marijuana yields. Below you will find more details. Saving Cost for Growing Weed Indoor The key to saving money on indoor weed growing is efficient grow lights. Advanced LED grow lights, such as the Medicgrow Fold-800, which retails for just $280, are the best choice because they are more energy efficient and last longer than traditional HID lights. Besides, creating the right light schedule will optimize cannabis growth and minimize electricity bills. When shopping for grow tent kits, purchase a combination of high-quality grow tents and light to save money. An inexpensive grow tent is also a good choice. Fans are also a cost-effective ventilation choice when purchased separately. DIY grow tents will save money if you have enough time and energy to collect and assemble them. If you're a commercial grower, make sure to buy from a manufacturer-direct LED grow light merchant like Medicgrow, as they tend to be cheaper and have guaranteed quality and after-sales support. LED grow lights such as the Medicgrow Full Spectrum LED Grow Lights are ETL and DLC certified and qualify for rebates of up to 80% of the cost from major U.S. utility companies. How to Grow Marijuana Indoors Effectly Maximizing indoor cannabis production is not difficult if following our tips: optimize lighting, nutrients, environmental conditions, and variety selection. Use a high-quality LED grow light to provide the full spectrum light needed for different cannabis growing stages. It’s notable that, the MedicGrow NEO 1000W grow lights offer 2 switchable spectrums for the vegetative and cannabis flowering stages, specially designed for all cannabis growing stages. Also, purchase the right size LED grow light to ensure even light coverage and adjust the height appropriately to avoid light burns. Maintain proper temperature (20-30°C) and humidity (40-60%), and use fans and add CO2 to enhance air circulation and ensure adequate CO2 for cannabis's photosynthesis. Additionally, avoid over- or under-watering by using high-quality cannabis fertilizer and adjusting ratios according to the plant's stage of growth. Select high-yielding varieties such as Exodus and GSC, and use a PH meter and EC meter to monitor plant health regularly to detect and solve problems in time. Proper pruning and low-stress training such as top pruning and low-stress training such as topping, FIMing, and LST also promote more bud formation. These practices guarantee that marijuana grows healthy and strong in the growth stages of cannabis, laying the foundation for a bountiful harvest. Additionally, harvesting marijuana plants at the optimal time for maximum THC yield is also crucial. Conclusion After learning about the value and yield of a marijuana plant, you may be interested in and have read all of our growing tips in this article. Keep in mind that light always matters. By reading this article on maximizing the value of growing marijuana indoors, I hope you have gained insights into growing indoor marijuana and, one day, successfully growing high-quality, high-yielding cannabis to maximize profits. Related Post: What Nutrients are Required For Growing Cannabis? Cannabis Flowering Stage: A Week-by-Week Guide When and How to Harvest Marijuana? FAQ about How Much Can One Weed Make 1. How Much Money Can You Make off 12 Plants? Assuming an average yield of 1 pound per plant, the total yield from 12 plants would be about 5,443 grams. In the marketplace, marijuana may cost anywhere from $5 to $20 per gram. Therefore, the total revenue from 12 plants could range from $27,215 to $108,862. 2. How Much CBD Oil Can One Plant Produce? The amount of CBD oil extracted from a cannabis plant depends on the variety of the plant. Generally, a single cannabis plant can produce about 1 to 2 pounds (454 to 907 grams) of dried cannabis flowers. Cannabis flowers typically contain 10 to 20 percent CBD.
Learn more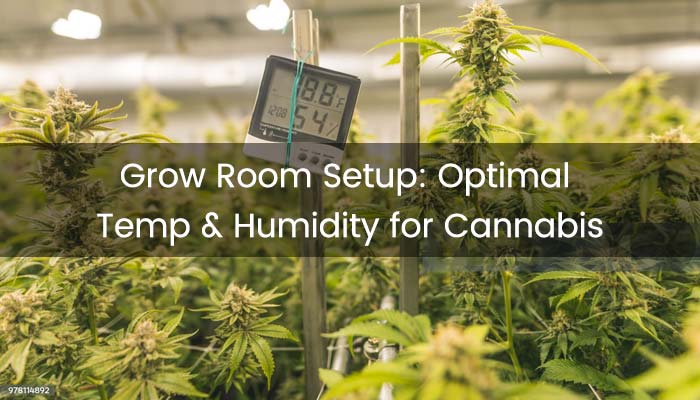
What is the Best Temp & Humidity for Cannabis Grow Room
As more regions legalize cannabis, both investors and individual growers are flocking to the industry. According to cannabis Sales Projections for US Markets in 2025, the cannabis market is expected to reach approximately $43 billion by 2025. This offers both opportunities and challenges for indoor growing, as it can be tough to produce high-quality cannabis products consistently. They have strict requirements for plant growth lights, nutrients, and temperature. But don't worry, Medic Grow is here to help. We’ll guide the ideal indoor temperature and humidity levels for different cannabis growth stages, including ideal seedling humidity and the best humidity for the flower. I hope this can help you create the perfect environment for your plants to thrive. Table of Contents Why are Temp and Humidity Important for Cannabis What Are the Optimal Temp and Humidity Levels for Cannabis How to Maintain Optimal Humidity Levels and Temperature Conclusion FAQs about Grow Room Temp and Humidity Chart Why are Temp and Humidity Important for Cannabis cannabis plants rely on optimal temperatures to perform photosynthesis effectively. High temperatures can lead to overheating, slowing down, or halting the outputs of photosynthesis. Conversely, low temperatures slow down the metabolic processes necessary for growth. According to a study from the University of Mississippi, the rate of photosynthesis in cannabis decreases significantly at temperatures above 30°C (86°F). Prolonged exposure to temperatures over 40°C (104°F) can cause irreversible damage and reduced yields. Extreme temperature fluctuations may even result in hermaphroditism in cannabis plants, allowing them to self-pollinate and produce seeds instead of flowers. On the other hand, humidity levels are crucial for preventing mold on cannabiss, especially during the flowering stage when dense flowers increase relative humidity. High relative humidity can promote the growth of molds such as botrytis (flower rot) and powdery mildew. Temperature and humidity also affect the plant’s ability to absorb nutrients. If the temperature is too high or the humidity is too low, the plant may struggle to take in essential cannabis nutrients, leading to deficiencies and reduced yields. As noted by Robert Clarke's Cannabis: Evolution and Ethnobotany, maintaining optimal temperature and humidity levels helps sustain an ideal transpiration rate, which promotes nutrient uptake and development in cannabis. Moreover, cannabis terpenes and resin are sensitive to temperature and humidity. Lower temperatures in the late flower (around 18-22°C or 64-72°F) help increase terpene distribution and resin content, enhancing potency and flavor. As you can see, the temperature and humidity in a grow room are crucial for cannabis and they can interact with each other. Maintaining optimal temperature and humidity can result in higher yields with more aromatic, potent, and flavorful flowers. Best temp and humidity chart for a cannabis What Are the Optimal Temp and Humidity Levels for Cannabis The best temperature and humidity levels for cannabis vary based on the growth stage. For seedlings, 68-77°F temp and 65-70% humidity. For vegetation, 72-82°F temp and 40-60% humidity. For flowering, 68-79°F temp and 40-50% humidity. The Night temp should be 5-10°F lower than the daytime. Adjusting the temperature and humidity based on the different growth stages of cannabis can better meet the plant’s needs. Below is a breakdown of the temperature and humidity requirements for each stage, along with a cannabis dry temp and humidity chart. Cannabis Seedling Stage Light On Temperature: 68-77°F (20-25°C) Light Off Temperature: 63-72°F (17-22°C) Humidity: 65-70% relative humidity (RH) During seedling, the plant needs a stable, warm environment (68-77°F) to support cell division and root growth. A drop in temp during the lights-off mimics natural nighttime, preventing stress and encouraging root development. For ideal seedling humidity, It's important to maintain high humidity levels of 65-70%. It's because seedlings have underdeveloped root systems and heavily rely on leaf transpiration for water absorption, maintaining high humidity levels helps retain moisture in the leaves. This recommended temperature and humidity closely mimic the natural conditions in spring when seedlings grow, which helps prevent heat stress and stretching, and is safer for beginners. Cannabis Vegetative Stage Light On Temperature: 70-85°F (21-29°C) Light Off Temperature: 65-75°F (18-24°C) Humidity: 40-60% relative humidity (RH) Higher temperatures (around 85°F) during the vegetative stage, combined with full spectrum light, high light intensity and proper air circulation, are particularly beneficial as they allow the plants to maximize their growth potential. In the early veg, maintaining higher humidity levels (around 60%) reduces the plant's transpiration rate, minimizing water loss and stress, thereby supporting healthy leaf and stem development. As the plants grow and the root system develops, gradually lowering the humidity to around 40-50% helps prevent mold and pests while encouraging stronger root growth. Cannabis Flowering Stage Light On Temperature: 65-80°F (18-27°C) Light Off Temperature: 65-75°F (18-24°C) Humidity: 40-50% Relative Humidity (RH) The best temperature for the flowering stage should be between 65-75°F. This temperature helps enhance terpene production, which contributes to the flavor and aroma of the final product. Lower temperatures also prevent heat stress, which can damage buds and reduce potency. On the other hand, the best humidity for the flowering stage should be 40-50%, as dense buds increase the ambient humidity, raising the risk of moldy weed. By keeping humidity lower, you can prevent mold and bud rot. This humidity also enhanced resin and terpene production, ensuring higher-quality buds. Jorge Cervantes confirms this in The Cannabis Encyclopedia, emphasizing the importance of controlling humidity for a successful harvest. Harvesting Cannabis Temperature: 60-70°F (15-21°C) Humidity: 55-65% Relative Humidity (RH) Duration: Typically 7-14 days The best temperature and humidity levels for drying cannabis are 60-70°F (15-21°C) and 55-65% relative humidity. As outlined in Ed Rosenthal's The Marijuana Grower's Handbook, these ideal parameters help prevent mold and preserve the potency of the cannabis. This is because cannabinoids like THC and CBD, as well as terpenes, are volatile and can degrade at high temperatures and low humidity levels. The recommended parameters not only help preserve cannabinoids but also prevent the cannabis from becoming overly dry. Finally, after harvesting, cannabis should be stored in airtight glass jars in a cool, dry, and dark place. Maintain a relative humidity of 55-65% and keep the temperature below 70°F (21°C) to extend its shelf life. If you're interested, also check out: Does Weed Expire? Above is the ideal temperature and humidity for drying indoor-grown cannabis. You can also save the image below, which summarizes the temperature and humidity levels for all stages of cannabis growth. Hope this helps with your growing journey! How to Maintain Optimal Humidity Levels and Temperature We've learned about the varying temperature and humidity requirements for different cannabis growth stages. To cultivate cannabis successfully, it's crucial to control the temperature and humidity in your grow room. Here are some effective methods to help you. Tools Preparation Using the right tools can make all the difference. To accurately track temperature and humidity conditions and adjust them as needed, be sure to have the following tools on hand. Thermo-hygrometer: Choose a device that measures both temperature and humidity and has a digital display for easy and accurate readings. Air conditioner: Opt for a unit with energy-saving, heating, dehumidifying, and timer functions to efficiently control temperature and humidity while cutting down on energy costs. Grow Fan: Select an oscillating fan with variable speed settings to improve airflow circulation more effectively. Dehumidifier: Pick a model with smart dehumidification and timer features, and ensure it’s appropriately sized for your grow room. Humidifier: Choose one with a humidity sensor and display, offering faster humidification for easier moisture adjustments. Portable heater: Go for a compact, energy-efficient heater with thermostat control to maintain consistent warmth and save energy. How to Lower Humidity To reduce humidity in your grow room, use fans to enhance airflow and a dehumidifier to regulate moisture levels. Properly space plants for better circulation, and consider air conditioning to further lower humidity. Monitor conditions regularly with a hygrometer to maintain an ideal environment. How to Increase Humidity To increase humidity in a grow room, using a humidifier is the most effective method. Alternatively, placing buckets of water inside the tent, and hanging damp towels can help raise humidity. Other methods include lightly misting the plants, lowering the temperature, or increasing plant density. Adjusting Temperature Using the tools mentioned above can make managing the temperature in your grow room easier. Exhaust fans can expel hot air from the tent and bring in fresh, cooler air, which also helps increase CO2 levels—an essential element for photosynthesis. If you’re using HID or fluorescent lights and find that the temperature is too high, consider switching to LED grow lights. Their aluminum construction allows for efficient passive cooling. Additionally, adjusting the distance between the grow lights and the plants can effectively control the temperature they receive, preventing heat stress while ensuring adequate light exposure. Conclusion In conclusion, creating an optimal grow room environment with the right temperature and humidity is essential for cannabis growth. By maintaining the ideal conditions for each growth stage and using the proper tools, you can achieve consistent growth, vigorous plants, and a high-quality harvest. FAQs about Grow Room Temp and Humidity Chart 1. What Is the Best Humidity for the Flower? In the early flowering (weeks 1-4), maintaining humidity at 45-50% allows the plants to transition smoothly from the vegetative phase. By the late flowering (weeks 5-8 and beyond), humidity should be reduced to 40-45% to prevent mold growth and promote resin production. 2. What Humidity Level Is Optimal for Indoor Cannabis Growing? The optimal humidity level for indoor cannabis growing depends on the plant's growth stage: Seedling: 65-70% humidity. Young plants need high humidity. Vegetative: 50-60% humidity. This encourages healthy root development. Flowering: 40-50% humidity. This prevents mold and mildew. 3. What Is the Ideal Seedling Humidity? The ideal humidity level for cannabis seedlings is 65-70%. This high humidity helps young plants absorb moisture through their leaves as their root systems are still developing. Maintaining this range promotes healthy growth and minimizes stress on the seedlings. 4. What Is the Best Temp and Humidity for Drying Cannabis? The ideal temperature for drying cannabis is 60-70°F. This range helps ensure a slow and even drying process, which preserves flavor and potency. For humidity, aim for 50-60%. This humidity prevents the cannabis from drying too quickly, which can lead to harsh smoke and loss of essential oils.
Learn more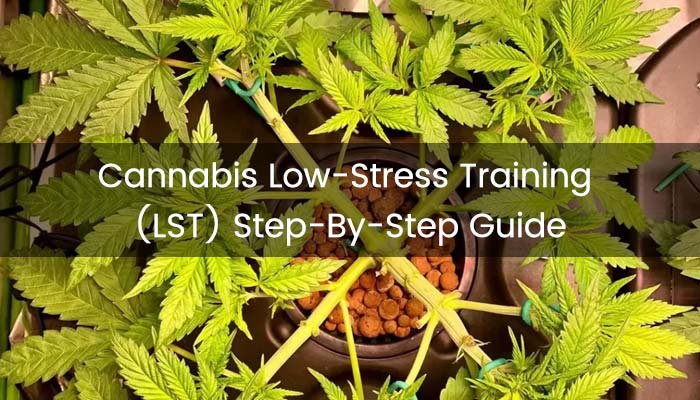
Low-Stress Training (LST) Cannabis Step-By-Step Guide
When growing cannabis, you may encounter issues like poor yields or suboptimal harvests, which could be due to not fully utilizing growing techniques. Successful cannabis growing requires more than just the right strain, nutrients, and efficient LED grow lights—it also demands effective cultivation methods. One such technique is low-stress training (LST), which is popular and highly effective in improving yields. LST flattens the cannabis canopy, exposing more bud sites to light and maximizing light utilization. In this article, we provide a detailed step-by-step guide to implementing LST, along with the best timing for starting low-stress training. If you find this article helpful, please subscribe and bookmark it—we’ll continue to bring you the latest cultivation tips. Table of Contents What is Low-Stress Training? Pros and Cons of Low-Stress Training Weed When to Start LST? How to LST Weed Plants (Step by Step) Conclusion FAQs about LST Cannabis What is Low-Stress Training? Low-stress training (LST) is a cultivation method where branches are gently bent and tied down to encourage horizontal growth and create an even canopy. This technique allows more light to reach lower parts of the plant, promoting uniform growth and potentially higher yields. Unlike high-stress methods like topping cannabis, LST minimizes stress on the plant, making it a gentler way to increase bud sites and improve light penetration. LST is particularly useful in small grow tents, as it helps keep the plant more compact. It requires regular maintenance to adjust the ties as the plant grows, ensuring that branches don't become crowded or damaged. By carefully managing the plant's growth, LST can lead to more efficient use of space and better overall results. Pros and Cons of Low-Stress Training Weed Before we start, let's briefly compare the pros and cons of Low-Stress Training to help you decide whether to use LST for your plants. Pros of Low-Stress Training Weed Low-stress training (LST) is a highly effective technique that offers multiple benefits for plant growth, particularly in controlled environments like indoor gardens. By gently bending and spreading the plant's branches, LST creates a more even canopy, which allows light to penetrate more deeply into the plant and a larger area to receive full spectrum light. This enhanced light distribution promotes uniform growth, maximizes photosynthesis efficiency, and results in bigger and more numerous buds, leading to higher yields. As LST enables growers to control the height and shape, it helps maximize yields by improving airflow around the foliage. Better airflow reduces the risk of mold, mildew, and pest infestations, contributing to overall plant health. Unlike high-stress training methods like topping, which involves cutting parts of the plant, LST is a gentler approach that minimizes stress, reducing the risk of infections or stunted growth. Overall, LST is a gentle and effective way that enables growers to achieve bigger yields from the same grow lights and grow tent kits without any additional cost. Cons of Low-Stress Training Weed If there are any drawbacks to LST, it is that LST is time-consuming and requires a certain amount of skill and patience to carefully bend and secure the branches while regularly monitoring the plant's status. As the effects of LST take time to show, it is important to check the plants at least every few days to see if the stems have shifted, allowing for timely adjustments to achieve the best results. Additionally, LST is gentle but risky, bending branches can lead to snapping or breaking if not handled carefully, which can stress the plant or create entry points for pests and diseases. In conclusion, Low-Stress Training is a gentle and effective growing technique that promotes plant growth and improves yield. However, it requires patience and a lot of experience, so If you're patient and eager to learn, then follow our growing guide and start LST! When to Start LST? The best time to begin Low-Stress Training (LST) is in the plant's early vegetative stage when the plant has grown 3 to 5 nodes. At this stage, the branches are still flexible, so it is easier to gently bend and shape the plant to form an even canopy that maximizes light. Starting LST early allows you to better shape the structure of the plant, promoting lateral growth and an even crown. Early training also helps to establish multiple main branches, which leads to more flowering points later on. However, LST is not a one-time effort; it is an ongoing process. As the plant grows, you'll need to periodically check and adjust the ties to guide new growth. Continuous adjustment ensures that the plant maintains an even canopy and that light reaches as many as the buds of the plant. How to LST Weed Plants (Step by Step) LST essentially bends and secures the cannabis stem to change the direction of growth, and can also be combined with Topping for even better results. Before we get started, let's prepare some tools to use for tying: Soft ties, garden wire or plant-specific ties Small stakes or anchors Healthy marijuana plants Sharp scissors (if you're going to Topping) Step 1: Start Early Start training the plant when it has 4 to 6 nodes (sets of leaves). At this stage, the stems are flexible and less likely to break when bent. Identify the main stem or a strong branch to start training, which is usually the topmost or tallest branch. If you want to top your cannabis plants, it's also the optimal time to do it during the 4-6 node vegetative stage. Topping involves cutting off the plant's top growth point with scissors. After topping, combining it with LST (Low-Stress Training) can help promote the development of multiple side branches, increase bud number, and make better use of the light. For more details about topping, you can refer to this post: "How to Top a Marijuana Plant?" Step 2: Bend and Secure the Main Stem If you choose not to top the plant, you will need to bend the main stem. Once you have identified the main stem, gently bend the main stem or tallest branch downward to promote horizontal growth. Be careful not to break the stem; the goal is to create a gentle curve. Then use soft ties to secure the bent branch to the side of the planter or other anchor point. Make sure the ties are loose enough to allow for growth and movement. The point of this step is to keep all stems the same distance from the light source, allowing light to reach each part of the plant. Step 3: Train More Branches As the plant grows, repeat the process for the following branches, bending them outward and securing them to create an even crown. Ensure that the branches are evenly distributed to avoid crowding, thus ensuring that light reaches all parts of the plant. The key point at this stage is to avoid bending too late when flexibility decreases and young trees are more likely to bend than older ones. Another point is to bend the pliable parts of the cannabis stems, which are located below the top leaves, and secure them gently with ties. Avoid bending the stems if they feel stiff, which could break them. Step 4: Regular Adjustments As the plant continues to grow, repeat this for any stems that are taller than the rest of the stems until the top of the plant flattens out to keep the canopy even and ensure that each branch has enough space and light. The plant training process requires you to patiently tend to your marijuana plants so that you can slowly shape a more even canopy as they grow, and also to avoid finding irregular branches too late so that you can bend them before they become too hard. If you accidentally break a stem, immediately secure the two broken stems together with tape and watch for a while so the plant has a chance to heal. Step 5: Final Adjustments Before Flowering Make the final adjustments to your plants before they enter the flowering stage. The cannabis flowering stage typically begins when transitioning grow lights to a 12/12 light cycle. Once flowering starts, the plant will focus on bud development, and further training may stress the plant. Therefore, the last chance to use LST is within the first few weeks of the flowering stage. As buds begin to form, some branches may become heavy. Use additional ties or stakes to support these branches and prevent them from breaking. Avoid LST after the first month of flowering unless colas grow too close to the grow lights or other parts of the plant aren’t receiving enough light. This ensures that all buds receive sufficient light. Step 6: Harvest Cannabis After a month of flowering, your LST (Low-Stress Training) and other works are finally complete. When your plants are ready for harvest, be careful when removing ties and supports to avoid damaging the branches or buds. If you’ve correctly followed our LST steps throughout the cannabis growth stages, congratulations! Your plants should yield a higher harvest under the same grow lights. Conclusion By incorporating Low-Stress Training (LST) into your cannabis cultivation, you can significantly enhance light exposure and improve overall plant health. Whether you’re a beginner or an experienced grower, LST is a valuable tech for maximizing your harvest potential. For more related information, please subscribe. We will keep you updated with helpful cultivation tips and insights. Related Posts: How to Identify and Use Male Cannabis Plant How to Use Cannabis Nutrients A Guide for Cannabis Flowering Stage FAQs about LST Cannabis 1. When Should I Start LST Training? It's best to start low-stress training (LST) on your cannabis plants when they have 4 to 6 nodes, typically around 3 to 4 weeks into the vegetative stage. It is beneficial to continue LST during the early flowering stages, but avoid LST after a month of flowering, which can interfere with flower growth. 2. Does LST Increase Yields? Yes, Low-Stress Training (LST) can help increase cannabis yields by creating a more even canopy allowing for better light distribution. LST also improves airflow around the plant, reducing the risk of mildew and enhancing health. This promotes the growth of more flower sites, leading to higher yields. 3. What Is the LST Technique for Growing? Low-stress training (LST) involves gently bending and securing the main stem of plants to force them to change their growth direction. This promotes a more even canopy and improves the effectiveness of grow lights, encouraging the development of multiple flower sites and enhancing overall yield.
Learn more
Topping Cannabis: When and How to Top Marijuana Plant
Topping cannabis is a time-tested gardening technique for both indoor and outdoor plants. Cutting off the plant's top forces it to grow multiple main colas (flowering tops), creating a denser structure, and allowing for even light distribution. This contributes to higher yields and better flower quality. As indoor cannabis cultivation has gained popularity, growing cannabis has evolved into a technical craft, with terms like Topping, Fimming, LST, and SCROG becoming part of the everyday vocabulary for growers. Today, we'll focus on how to top a marijuana plant—a fundamental technique that can significantly influence your plant's growth pattern and yield. With our straightforward guide on topping cannabis, I hope you can achieve higher yields and better flowers. Table of Contents What is “Topping Cannabis” Why Topping Cannabis Plants Important When to Top Weed Plants How to Top a Marijuana Plant: Step-by-Step Guide Other Tips for Topping Cannabis Difference Between Topped and Non-topped Cannabis Plants Conclusion FAQs about Topping Cannabis What is “Topping Cannabis” Topping cannabis is a gardening technique cutting the main stem just above a node, usually after 4-6 nodes have formed. This encourages the plant to produce multiple main colas (flowering tops) instead of just one, leading to a bushier structure and higher yields. The key benefits of topping include increased yield due to the development of more flowering sites and a more uniform canopy that allows for better light distribution, which supports healthier overall growth and development. For best results, ensure the plant is healthy and has adequate recovery time after topping. Why Topping Cannabis Plants Important Topping cannabis significantly enhances plant growth and yield for both indoor and outdoor plants. By cutting the main stem, growers encourage the plant to develop multiple flower sites, ensuring better light distribution and improving airflow. This leads to a bushier, more productive plant. Additionally, topping is valuable for controlling plant height, making it easier to fit in a small grow tent. It also promotes branch growth and makes them thicker, which better supports the weight of heavy flowers and reduces the risk of branches breaking under the weight of a mature cola tree. Cannabis plants do not naturally grow in a manner that fully utilizes LED grow lights. Topping cannabis enables more even light distribution and allows light to reach the lower parts of the plants, leading to healthier and more robust growth. When combined with other training techniques such as Low-Stress Training (LST) or Screen of Green (SCROG), topping can further optimize plant shape, light and space utilization for better results. When to Top Weed Plants The best time to top weed plants is during the vegetative stage, around the 3rd to 4th week of growth when the plant has developed 4-6 nodes. Make sure the plant is healthy before topping and allow the plant time to recover after topping. Topping too early or too late can limit its growth. If your plants are healthy, you can top them multiple times during the vegetative stage, giving them time to recover between each cannabis topping. However, stop topping a couple of weeks before switching to the flowering stage to avoid stressing the plants during their transition. How to Top a Marijuana Plant: Step-by-Step Guide Topping cannabis plants is a straightforward process, but it requires carefulness to ensure the plants respond well and continue to grow healthily. We provide a step-by-step guide and tips to help you successfully top marijuana. Step 1: Check the Health of Your Cannabis Before topping, make sure your cannabis plants are free of diseases or pests and in good condition. Topping will only go smoothly if your plant is healthy, strong and in a growth cycle where your plant has 5 to 6 leaf nodes. Step 2: Determine Where to Top First, locate the main stem of the plant, which is the main stem that grows directly upward from the soil. The top growing point is the highest point of the stem, usually the newest leaf or flower. Count down from the top growing point to find the 3rd or 4th node. A node is where a pair of leaves or branches grow out of the stem. Once you've determined this, you can begin cutting the stem. Step 3: Cutting the Stem First, sterilize your scissors or grow tent kits thoroughly with alcohol to make sure they are clean and sharp. This is to prevent the introduction of bacteria or other pathogens into the plant during the cutting process. Find the node you identified earlier and cut right above it. Make sure to cut with a steady hand and with the right amount of force to avoid injuring other parts of the plant. This action removes the top growth point and encourages the plant to branch out into two new lateral branches at that node. When you cut the main stem, make sure you leave enough room for the new lateral growth to develop. Avoid cutting too close to the node to avoid damage. Step 4: Care after Topping Topping can be stressful for the plant, so it's important to give it time to recover. After topping, observe the plant closely over the next few days. You should notice two new growing tips begin to emerge where you made your cut. This indicates that the topping was successful and that the plant is redistributing energy to support new growth. During this time, make sure that the plant's environmental conditions (e.g. full spectrum light, water and nutrients) are suitable for its recovery. Avoid further pruning or topping within a short period to give the plant enough time to re-establish a healthy growth pattern. Step 5: Re-Topping (Optional) If you want your plant to flourish even more, you can top it again after it has grown more nodes. The process of topping is the same each time; select the right node, sterilize the tool, and cut. Be careful to stop topping a few weeks before the start of the flowering period. This is because topping slows down the growth of the plant and topping too late may affect the flowering process and the final yield. Overall, by topping at the right time and point, you can effectively promote the branching growth of your cannabis plants, thus greatly improving their structure and yield. After each topping, take care to give the plant enough time to recover and adjust your care to its growth to ensure that it stays healthy throughout its growth cycle. Other Tips for Topping Cannabis Now that you've mastered the best timing and techniques for topping cannabis, are you eager to give it a try? Hold on! We've got some additional tips for topping cannabis: After topping, cannabis plants generally take about 3-7 days to recover. Ensure optimal lighting, cannabis nutrients, and watering, to support the recovery process. Topping should be done during the vegetative stage when the plant has developed 4-6 nodes, typically around 3-4 weeks into vegetative growth. If you want to top again, wait until the new branches have developed several nodes after the first topping. Plants can be topped 2-3 times before switching to the flowering stage. You can top a tall cannabis plant but if the plant is already well into the flowering stage or too tall, topping might not be ideal, as it can reduce yield. In addition, we cover the differences between Topping and Super Cropping and Fimming. Topping vs. Super Cropping Topping and super cropping are both techniques used to enhance cannabis growth, but they differ in approach. Topping involves cutting off the plant's top growth point, while super cropping involves gently bending and slightly damaging the stems. Both methods can increase productivity. Topping vs. Fimming Topping involves cutting off the entire top growth tip to form two new main colas. Fimming requires cutting about 75% of the top growth tip to produce 3-5 new colas. Topping results in a more controlled growth pattern, while filming can lead to a fuller canopy with potentially more colas. The term Fimming comes from the phrase “f**k it, I missed it” and it is thought that the first person to try this technique made a mistake when trying to trim his cannabis plants, but succeeded and his cannabis grew more new stems. Fimming may not be the optimal pruning technique, but it is effective for growers with 2-4 cannabis plants in a confined space. It can result in the development of 3-5 new main stems from each fimmed site, leading to a bushier plant. In summary, topping, super cropping, and filming each offer unique benefits depending on experience and space. Topping is simple, easy to learn, and suitable for small to medium spaces. Super cropping requires more skill and is better suited for medium to large spaces. Fimming is ideal for limited vertical height and encourages horizontal growth. Difference Between Topped and Non-topped Cannabis Plants Topped cannabis plants often excel in indoor environments with limited vertical growth space, promoting bushier growth and better light distribution. In contrast, non-topped plants are ideal for outdoor cultivation, where natural growth patterns and taller growth can occur without space limitations. Here are the detailed differences between them. Benefits of Topped Cannabis Plant Better light distribution across the plant after topping makes it easier for light to penetrate all parts of the plant, promoting even growth. Topping the plant causes the plant to transfer growth hormones to the lower branches, resulting in a more lush structure and multiple main stems. Topping encourages the plant to develop more flower sites and to take full advantage of light, nutrients and carbon dioxide, thus potentially increasing total yield and flower quality. Topping allows air to circulate more freely around the plant, thus reducing the risk of mold, which is especially important in cramped and humid growing conditions. Benefits of Non-topped Cannabis Plant Non-topped cannabis plants maintain a natural growth structure with a single dominant cola, leading to a strong central stem that can support the plant's weight more effectively. This vertical growth is ideal for growers who prefer taller plants or have limited horizontal space. Additionally, non-topped plants experience uninterrupted growth, allowing them to reach their full height more quickly. This approach also requires less intervention, making it a simpler option for growers who prefer a hands-off approach. In summary, topping alters the natural growth pattern of the plant, resulting in a bushier and more productive plant. On the other hand, untopped plants have a central cola and may be less productive than topped plants. However, they offer a simpler option for growers who prefer a hands-off approach. Conclusion In conclusion, topping is more suitable for small space cultivation and beginners, and if you combine topping with other techniques such as LST, the results will be better. However, it is important to remember to avoid topping too early or too late, correct topping ways and timing can significantly improve the quality and quantity of cannabis harvest. Related Post: What Nutrients are Required For Growing Cannabis? When and How to Harvest Marijuana Cannabis Flowering Stage: A Week-by-Week Guide FAQs about Topping Cannabis 1. How Long Does It Take Cannabis to Recover from Topping? Cannabis plants typically take 3-7 days to recover from topping. During this time, the plant redirects energy to lateral growth, developing multiple main colas. Providing optimal conditions, like proper light and nutrients, can help speed up the recovery process. 2. At What Stage Do You Top a Cannabis Plant? The best time to top a cannabis plant is during the vegetative stage, usually when it has 4-6 nodes. It is critical to ensure that the plant is healthy and growing well before performing the topping technique. Topping too early or too late can stress the plant or limit its growth potential. 3. Do Cannabis Plants Need to Be Topped? Topping is optional but beneficial for many growers. It encourages bushier growth, increases flower sites, and improves light penetration. However, it's not mandatory, especially if you prefer a simpler approach or are growing in a space where vertical growth is not restricted. 4. How Many Nodes Before Topping? It's best to wait until they have at least 4-6 nodes before topping. This ensures that the plant is strong enough to handle the stress and can redirect energy to developing new growth points. If the plant is growing well, you can repeat topping to further promote growth.
Learn more
Male Cannabis Plant: How to Identify and Use Them?
Cannabis is a unisexual plant divided into males and females. Male cannabis plants are primarily responsible for pollen production with their pollen sacs; females produce cannabinoid-rich flower buds. Male cannabis plants may be less popular than female plants for consumption or medical usage, but they also play an important role in the cannabis growth cycle. So before you decide to throw away your male weed plant, take a look with us at the specific differences, effects and early signs between male and female cannabis plants. We hope that after reading this article, you'll have a change of heart about the value of a male weed plant and know how to identify it. Table of Contents When Does a Male Cannabis Plant Show Gender Male vs Female Cannabis Plants How to Identify Male and Female Cannabis Plants What Are the Male Weed Plants Used For Benefits of Male Cannabis Plants Conclusion FAQs about Male Cannabis Plant When Does a Male Cannabis Plant Show Gender Male cannabis plants usually begin to show their sex about 3 to 6 weeks after germination, while female plants show their gender about 4-6 weeks. During this period, male plants begin to develop small pollen-producing sacs at the nodes. These sacs are the first visible sign of a male plant. This means that any assumptions about a cannabis plant's gender before the pre-flowering stage (typically 4-6 weeks after germination) are purely speculative. Indoor plants, under the influence of grow lights, may grow faster and reveal their gender slightly earlier. If you clone a male cannabis plant, the resulting clone will be male with 100% certainty, and the same applies when cloning a female plant. If you plant feminized seeds, there is a 99% to 100% chance of producing a female cannabis plant. However, hermaphroditism in cannabis plants usually occurs due to stress factors like excessive light, heat, or water. To minimize the risk, it's important to manage these growing conditions carefully during the first weed plant stage. Male vs Female Cannabis Plants Male and female cannabis plants play distinct roles in the plant's lifecycle. Male plants produce pollen sacs, which release pollen to fertilize female plants, leading to seed production. In contrast, female plants develop buds, which are rich in cannabinoids like THC and CBD. While female cannabis plants are the main focus of cultivation due to their production of potent resinous buds, male cannabis plants also provide several important roles including breeding, edibles, and use for fiber production. We can see that both male and female cannabis plants have their roles, and different growers handle them according to their preferences. So, how can we distinguish between male and female cannabis seeds? By understanding cannabis anatomy, we can differentiate male and female plants from several aspects. How to Identify Male and Female Cannabis Plants The sex of cannabis plants can be determined 4-6 weeks after germination by inspecting the nodes. Males usually reveal themselves earlier, developing small, smooth pollen sacs at the nodes around 3-4 weeks after germination, while females form V-shaped pistils with white hairs at around 4-6 weeks. These sexual characteristics are based on the plant's reproductive anatomy, with male plants primarily functioning to release pollen and female plants responsible for producing THC-rich flowers. Studies indicate that male plant pollen can fertilize female plants, leading to seed formation, which reduces the THC levels by 20% to 30%. Therefore, identifying male cannabis plants promptly is crucial for maximizing yield and quality. The following image illustrates the differences between male vs female cannabis plants. What Does a Male Marijuana Plant Look like Male cannabis plants are typically taller with thicker stems and fewer leaves. In the early stage, they develop clusters of small and rounded pollen sacs. In contrast, females are shorter and bushier with more leaves and V-shaped pistils that emerge from small, teardrop-shaped calyxes. Male marijuana plants are distinguished by the early development of small, round pollen sacs at the nodes where branches meet the main stem, which is also known as pre-flower. These sacs, typically appearing in clusters, are full and pendulous, resembling tiny balls, and usually emerge about 3 to 4 weeks after germination. Once mature, the male plant opens its pollen sacs, releasing pollen into the air to fertilize nearby female plants. Unlike females, male cannabis plants do not produce usable buds; instead, they grow taller with thicker stalks and fewer leaves, making them less bushy. They also contain lower levels of cannabinoids and have a milder aroma compared to female plants. Due to these characteristics, male cannabis plants are primarily used for breeding and industrial purposes, such as fiber production. What Does a Female Marijuana Plant Look Like Female marijuana plants are easier to identify as they grow slower and have denser leaves. In the early stages, they develop V-shaped pistils with two white hair-like structures. As they mature, they produce plump, dense flowers with a strong aroma, often displaying purple, green, and orange. The key early sign of female cannabis plants is their V-shaped pistils with white hair-like stigmas, which appear at the nodes where branches meet the main stem. These pistils, also known as pre-flowers, are crucial for identifying female plants. They eventually develop into dense, resinous buds that are highly valued for their high THC content. The growth focus of female plants is on producing large, sticky buds covered in trichomes. As a result, growers pay special attention to light, nutrients, and environmental conditions throughout the cannabis growth stages. These traits make female plants the preferred choice for growers aiming to harvest potent, high-quality cannabis. If you're interested in cultivating female cannabis, you might also want to read about how to identify female seeds for a deeper understanding. What Are the Male Weed Plants Used For Although male cannabis plants are not as popular as female plants and are often removed to prevent the fertilization of female plants, they have several important roles and benefits, particularly in breeding. Breeding and Pollination Male cannabis plants provide the pollen needed to create new cannabis strains. By carefully selecting male plants with desirable traits—such as high yield, disease resistance, or unique aromas—breeders can cultivate offspring with similar characteristics. Edible Uses The leaves and stems of male cannabis plants can be juiced like other leafy greens. Raw cannabis contains beneficial nutrients, including vitamins, minerals, and antioxidants. Juicing raw cannabis also provides non-psychoactive cannabinoids, such as THCA and CBDA, which are believed to have anti-inflammatory, antioxidant, and neuroprotective properties. Cannabis leaves are rich in fiber, vitamins, and minerals, making them a nutritious addition to various dishes. They can be added to salads, sautéed with garlic and olive oil, or cooked in soups and stews. Hemp Fiber Production Male cannabis plants are often taller and have thicker stalks, making them ideal for producing hemp fiber. This fiber is used in various industrial applications, including textiles, ropes, and building materials. The fiber from male plants is often considered finer and softer, making it preferred for certain applications, such as clothing and paper. Improving Soil Health Male cannabis plants can be used as cover crops in gardens or fields, helping to prevent soil erosion and improve soil aeration, which enhances water infiltration and promotes the growth of beneficial microorganisms. After male weed plants have served their whole life, they can be composted and add organic matter to the soil. This organic matter improves soil fertility by increasing essential nutrients like nitrogen, phosphorus, and potassium. Additionally, male cannabis plants can be grown as companion plants to improve soil quality. When grown alongside other crops, their roots help break up compacted soil, facilitating better root penetration and nutrient uptake for surrounding plants. Pest Control Male cannabis plants produce fewer cannabinoids and terpenes than female plants, but they still release certain aromatic compounds that attract beneficial insects like predatory beetles, ladybugs, and parasitic wasps. These insects help control pests, such as aphids, spider mites, and other harmful insects, by feeding on them. This is a natural and effective way to manage pests. The aromatic compounds extracted from male cannabis plants, such as certain terpenes, can also serve as natural insect repellents. These compounds can help deter pests like aphids, whiteflies, and caterpillars, reducing the need for chemical pesticides. While male cannabis plants are not typically used for direct consumption due to their lack of psychoactive buds, they have irreplaceable value in breeding, improving soil health, pest control, and fiber production. Benefits of Male Cannabis Plants Genetic Diversity Male cannabis plants contribute vital genetic material for breeding new strains, helping to maintain and expand a diverse gene pool. This diversity allows growers to select for qualities such as cannabinoids, terpenes, pest resistance and yield potential traits to produce strains with a variety of characteristics. Cannabis Extracts Although male cannabis plants produce lower levels of cannabinoids like THC and CBD compared to female plants, they still contain some cannabinoids and terpenes. These compounds can be extracted and used in applications such as low-THC or low-CBD oils, commonly used in cooking, skin care, massage oils, and nutritional supplements. Extracts from male cannabis plants can also be used to create salves and creams, leveraging the anti-inflammatory and antioxidant properties of cannabinoids and terpenes to provide relief from muscle soreness. Scientific Research Male cannabis plants are valuable in scientific research, especially in studies related to plant genetics, disease resistance, and environmental adaptability. Scientists study the genetics of male cannabis plants to identify genes responsible for traits like pest resistance, drought tolerance, and growth patterns, which were published in the Journal of Plant Science. This research aims to create new strains with improved cannabinoid profiles, enhanced flavors, or higher yields. A report in the Plant Pathology Journal also indicated that some male cannabis plants exhibit natural immunity or resistance traits, which, when bred into new strains, can reduce crop losses and minimize pesticide use. Additionally, studies published in the Journal of Organic Farming have explored the use of terpenes from male cannabis plants as natural insect repellents, providing an organic alternative to synthetic pesticides. These studies, along with numerous others, demonstrate the important role male cannabis plants play in advancing cannabis cultivation, breeding, and research. Conclusion Although male cannabis plants are not as popular as female plants in cultivation, they play an irreplaceable role in pest control, improving soil health, industrial products, and scientific research. By now, you’ve likely gained a new appreciation for male cannabis plants—let’s make the most of their value! Related Posts: What Nutrients are Best For Growing Cannabis When to Harvest Marijuana Cannabis Flowering Stage Growing Guide FAQs about Male Cannabis Plant 1. Is It Good to Have a Male Cannabis Plant? Having a male cannabis plant can be beneficial If you're focused on breeding new strains or improving genetic diversity. They also contribute to soil health and can be used for industrial purposes like fiber production. However, if you want high-quality, seedless flowers, male plants should be removed. 2. When Can You Tell if a Cannabis Plant Is Male or Female? You can typically tell if a cannabis plant is male or female during 4-6 weeks after germination. Male plants often show their sex slightly earlier by developing small, round pollen sacs around 3-4 weeks. Female plants will develop V-shaped pistils with white, hair-like stigmas around 4-6 weeks. 3. What Are the Early Signs of a Male Cannabis Plant? When early female cannabis plants can be recognized by the white pistil, male cannabis plants are identified early by their small, rounded pollen sacs, which are their typical early signs. Male plants usually show these signs about 3 to 4 weeks after germination, slightly earlier than female plants. 4. Can You Get Flowers from a Male Cannabis Plant? Male cannabis plants do not produce the flowers that are typically sought after for their plant compound content. Instead of developing dense, resinous flowers like females, male cannabis plants produce pollen sacs. These sacs contain pollen, which is used to fertilize female plants, leading to seed production. 5. What Does a Fully Grown Male Cannabis Plant Look Like? A fully grown male cannabis plant is characterized by its tall, elongated structure and the presence of numerous pollen sacs. Unlike females, males do not produce dense flowers, focusing instead on spreading pollen. Their foliage is also less dense, giving them a more open and spindly appearance.
Learn more
What Nutrients are Required For Growing Cannabis?
Cannabis cultivation is a difficult procedure requiring a range of nutrients to produce a good crop. Cannabis plants may need a variety of nutrients and nutritional solutions, depending on the growing technique employed. Having the proper cannabis nutrients and cannabis fertilizer is crucial for giving your plants the energy and nutrition they require to thrive, whether you're growing cannabis hydroponically or in soil. In this post, we will discuss the crucial cannabis nutrients, plant food for cannabis to grow and the best fertilizer for marijuana, along with how and where to pick the best hydroponic nutrition solutions to keep your plants healthy. Table of Contents: The Main Nutrients in Cannabis The Basics of Cannabis Nutrients How Often Should Nutrient Solution Be Split for Cannabis Plants? Organic Cannabis Nutrients or Minerals Where to Get Nutrients for Cannabis Plants? Conclusion FAQs about Cannabis Nutrients The Main Nutrients in Cannabis Nitrogen (N) Nitrogen is one of the most important nutrients for cannabis plants and is essential for healthy growth. It is primarily obtained from the soil in traditional growing methods. However, if you are using a hydroponic system or an LED grow light setup, you will need to supplement with nitrogen through specific cannabis fertilizer. Nitrogen is required in large amounts by cannabis plants during their vegetative stage and is necessary for producing lush green foliage. During the flowering stage, however, less nitrogen is needed, and too much can cause your buds to be airy and underdeveloped. As a result, it's advisable to monitor your nutritional levels and make sure they're balanced when producing cannabis. Phosphorus (P) Phosphorus is another critical cannabis nutrient, particularly during the flowering stage. In hydroponic systems, phosphorus must be provided through specifically formulated cannabis fertilizer. Your cannabis plants' metabolism will accelerate with the help of phosphorus, resulting in quicker development. As phosphorus promotes the growth of flowers and fruits, it is particularly beneficial during the cannabis flowering stage. Without enough phosphorus, your cannabis plant will struggle to grow properly. To prevent this, use cannabis plant food such as bloom fertilizers, bone meal, and bat guano. Potassium (K) Potassium plays a key role in overall cannabis plant health, supporting nutrient absorption and enzyme activity. In soil-based systems, potassium can be sourced from mineral deposits or organic matter like compost or manure. In hydroponic systems, potassium needs to be included in the nutrient solution to keep levels balanced. When using LEDs for hydroponic systems, ensure they are full-spectrum LED grow lights with adequate blue and red wavelengths as these help with nutrient absorption. Finally, keep an eye on potassium levels, as an excess can lead to toxicity issues that may impact plant health. Magnesium Magnesium is a key component of chlorophyll molecules, which are necessary for photosynthesis in cannabis plants. Without enough magnesium, your plants cannot effectively convert sunlight into energy, leading to reduced glucose production. Magnesium also aids in the metabolism of glucose after it has been synthesized. A common sign of magnesium deficiency in cannabis plants is the yellowing of leaves and discolored veins. This can be addressed by using cannabis plant food such as Epsom salt, dolomite lime, and magnesium-rich fertilizers. Calcium Calcium plays a significant role in the growth and health of cannabis plants. It becomes particularly relevant in hydroponic systems, where calcium levels in the growing medium may be lower.In soil-based systems, calcium is usually available in sufficient quantities, but when using UV grow light to improve cannabis growth, additional calcium supplementation may be needed. Calcium supports healthy root development and contributes to the formation of strong cell walls in your plants.Calcium also helps improve the uptake of other essential cannabis nutrients, enhancing the effectiveness of the marijuana fertilizer you use. To maintain balanced calcium levels, use a cannabis fertilizer containing calcium carbonate or add a calcium supplement to your hydroponic solution. In addition to these key cannabis nutrients, your plants also require non-mineral elements, typically sourced from water and air. These include elements like carbon, hydrogen, and oxygen, which are essential for plant growth. The Basics of Cannabis Nutrients It's important to understand the basics of cannabis nutrients when growing cannabis. Like all plants, cannabis requires specific nutrients and fertilizer to grow and thrive. Three key elements—nitrogen, phosphorus, and potassium—are essential for cannabis growth. These elements, commonly referred to as "macronutrients," are usually present in most soils and cannabis fertilizer solutions. In addition to these, cannabis also needs secondary nutrients, such as calcium, magnesium, and sulfur, to grow and develop properly. These nutrients can be found in sources like dolomite lime, Epsom salt, gypsum, and other cannabis plant food. Cannabis plants require a balanced fertilizer solution throughout their entire life cycle to reach their full potential. The specific amounts of each nutrient needed will depend on the strain being cultivated and environmental factors like light, temperature, and humidity. Along with providing these essential nutrients, it's also important to monitor pH levels and ensure that nutrient solutions remain within a range that supports optimal plant growth. How Often Should Nutrient Solution Be Split for Cannabis Plants? The frequency of applying cannabis nutrients depends on the different weed plant stages. During the seedling stage, a mild nutrient solution should be applied every 2-3 days. In the vegetative stage, nutrients are needed every 2-4 days. During flowering, use a phosphorus and potassium-rich solution every 2-3 days. Additionally, we provide the following picture that illustrates the proportion of nutrient solutions for each stage of cannabis growth. The primary difference between cannabis nutrient formulations is the N:P:K ratio of the cannabis fertilizer. Weed Vegetative Stage Nutrient Ratios During the vegetative stage, cannabis plants go through several phases with different nutrient needs. In the early vegetative stage (around 3-4 weeks), use a cannabis fertilizer with a 2:1:3 ratio of nitrogen (N), phosphorus (P), and potassium (K). As the cannabis progresses to the mid-vegetative stage (around 4-6 weeks), switch to a fertilizer with a 4:2:3 (N:P:K) ratio. Once the plants reach the late vegetative stage, typically around 6 weeks after germination, it's recommended to use a 10:5:7 ratio fertilizer to support the more mature plants. As the plants approach the end of the vegetative stage, a balanced 7:7:7 marijuana fertilizer is suitable to maintain overall plant health before transitioning to the flowering stage. NPK cannabis ratio for the vegetative stage Cannabis Flowering Stage Nutrient Ratios During the cannabis flowering stage, fertilizer requirements change significantly. In the early flowering stage, cannabis plants need less nitrogen and more potassium, so a 5:7:10 (N:P:K) fertilizer for cannabis is ideal. As the plants progress into the mid-flowering phase, switch to a 6:10:15 fertilizer. In the final stage of flowering, a 4:7:10 fertilizer is recommended to support the plants through to harvest. NPK cannabis ratio for the flowering stage In the final 1-2 weeks before harvesting cannabis, flush the plants with plain water every 1-2 days to remove excess nutrients. Adjust the fertilizer frequency based on whether your plants show signs of nutrient deficiency or nutrient burn. If you're not sure what the signs of nutritional deficiencies or nutritional burn are, we've provided a brief reference and solution below. Cannabis Nutrient Deficiencies Yellowing Leaves: Linked to nitrogen or magnesium deficiency. Adjust nitrogen levels in the nutrient mix during the vegetative stage and add magnesium supplements like Epsom salts. Brown or Rusty Spots: Signs of calcium, phosphorus, or potassium deficiency. Ensure nutrient solution contains adequate levels of these nutrients. Purpling or Reddening of Stems: Indicates phosphorus deficiency. Increase phosphorus during the flowering stage to support healthy growth. Interveinal Chlorosis: Yellowing between leaf veins indicates magnesium or iron deficiency. Address magnesium issues with Epsom salts and consider a chelated iron supplement. Leaf Curling or Deformation: Typically points to calcium or boron deficiencies. Use a Cal-Mag supplement for calcium and correct boron with a micronutrient formula including boron. Regularly monitoring pH levels and adjusting cannabis fertilizer can help prevent and correct cannabis nutrient deficiencies, ensuring healthy plant growth. Nutritional Burn Burnt Leaf Tips: This is a clear indicator of over-fertilization. Reduce the nutrient concentration in your feeding regimen by diluting your nutrient solution with water. Dark Green Leaves: Excess nitrogen often causes leaves to darken. Cut back on nitrogen-rich fertilizers, especially during the flowering stage when the plant requires less nitrogen. Leaf Curling: Curling edges can result from nutrient stress due to overfeeding. Flush the growing medium with pH-balanced water to remove excess nutrients. Yellowing Leaves with Burnt Spots: Yellowing, especially with burnt edges, signals nutrient overload. Reduce feeding frequency and consider flushing the medium. To prevent nutrient burn, start with a lower concentration of cannabis nutrients and increase gradually as the plant responds. If there is an excess, reduce the amount of the corresponding nutrient we mentioned above and rinse the roots with water to remove salts. After the final phase of nutrient application, test the soil pH with a digital meter. Cannabis thrives in slightly acidic soil conditions and can tolerate a pH range of 5.0-7.0. Maintaining pH levels between 5.8 and 6.2 is optimal for cannabis growth. Image Source: fluence.science Organic Cannabis Nutrients or Minerals You have two major options when it comes to providing your plants with the essential cannabis nutrients: organic nutrients and mineral (synthetic) nutrients. Organic cannabis nutrients come from natural sources like compost, manure, and worm castings. These nutrients are released slowly as the organic material breaks down, which may require more frequent applications compared to mineral nutrients. On the other hand, mineral nutrients, which are synthetic and laboratory-produced, are often used in hydroponic systems and with LED grow lights. These nutrients are more readily available and quickly absorbed by plants, making them a popular choice for growers seeking immediate results. Both organic and mineral nutrients can provide the essential elements needed for healthy cannabis growth. However, it's important to monitor nutrient levels carefully to avoid deficiencies or toxicities, which can occur if any nutrient is missing or is not in the correct ratio. The choice between the two depends on your growing method and whether you prefer a natural approach or a more controlled, fast-acting solution. Where to Get Nutrients for Cannabis Plants? Where to receive the essential cannabis nutrients for your plants is among the most crucial factors to think about when producing cannabis. Depending on your location, growing setup, and specific needs, you have several options for sourcing cannabis nutrients. Using high-quality soil and cannabis-specific fertilizers is an effective way to provide your plants with the necessary nutrients. These products can be purchased from specialty hydroponic shops, online stores, or garden supply centers. Many manufacturers offer pre-mixed nutrient blends specifically designed for cannabis, ensuring your plants receive the right balance of nutrients. You can be sure that your plants are receiving the correct cannabis nutrients they require because many manufacturers have already incorporated a particular blend of organic nutrients designed specifically for cannabis growth. If you'd rather do it yourself, you may buy individual nutrients from any garden center or home improvement store. Liquid fertilizers are another option, but it's important to research the best products and application methods for your specific growing conditions. Additionally, consider using natural supplements like kelp extract, fish emulsion, compost tea or other plant food for cannabis, which can be sourced from farmers' markets or online organic gardening suppliers. These supplements can enhance the nutrient profile of your cannabis plants and improve overall growth. Conclusion In summary, growing healthy cannabis plants requires a balanced supply of essential nutrients, including macronutrients like nitrogen, phosphorus, and potassium, as well as secondary nutrients and micronutrients. By understanding the specific needs of your plants and providing the right cannabis nutrient ratio at each stage of growth, you can optimize their development and achieve higher yields. Related Post: What Is the Optimal PPFD for Cannabis Improving Cannabis Potency: 2024's Latest Insights Grow Light vs. Sunlight: Which is Best for Growing Cannabis FAQs about Cannabis Nutrients 1. What Are the Essential Nutrients for Cannabis? Cannabis plants require a balanced mix of essential nutrients to thrive, including nitrogen (N), phosphorus (P), and potassium (K)—nitrogen supports vegetative growth, phosphorus is crucial for root and bud development, and potassium enhances overall plant health. 2. What Are the Best Types of Fertilizer for Cannabis? During the vegetative stage, use high-nitrogen fertilizers like fish emulsion. In the flowering stage, use high-phosphorus and potassium fertilizers, such as those with bat guano. Bone meal is an excellent source of phosphorus, while wood ash provides potassium. Dolomite lime can be used to provide calcium, and Epsom salts can be used for magnesium. These supplements ensure your plants receive the essential nutrients they need at each growth stage. 3. What Plant Food Is Best for Cannabis? Organic options like compost, worm castings, fish emulsion, and kelp extract promote soil health and enhance cannabis plant growth. Bone meal is a great source of phosphorus, while wood ash provides potassium. For calcium, consider using dolomite lime, and for magnesium, Epsom salts are effective. 4. Why Is Fertilizing Cannabis Important? Cannabis plants require a specific balance of macronutrients and micronutrients to support healthy growth. A proper NPK ratio (nitrogen, phosphorus, and potassium) ensures strong roots, lush foliage, and resin-rich buds, guaranteeing robust growth and a high-quality harvest.
Learn more
What Is the Optimal PPFD for Cannabis
Maximizing yield and bud quality is a common challenge for every cannabis grower. Understanding the ideal Photosynthetic Photon Flux Density (PPFD) for cannabis growth is crucial, as PPFD measures the light intensity that promotes photosynthesis. In this article, we will discuss the optimal PPFD values for each growth stage of cannabis plants, helping you to maximize the effectiveness of LED grow lights and enhance both yield and quality. Table of Contents: 1. Understanding PPFD (Photosynthetic Photon Flux Density) 2. Ideal PPFD Levels for Each Cannabis Growth Stage 3. How to Adjust PPFD for Optimal Growth 4. Key Factors to Consider When Modifying PPFD 5. Conclusion Understanding PPFD (Photosynthetic Photon Flux Density) What is PPFD? PPFD, or Photosynthetic Photon Flux Density, plays a vital role in the effectiveness of light for plant growth, especially in cannabis cultivation. It measures the number of photons (in micromoles) that hit a square meter of the plant’s canopy each second. In simple terms, it’s like counting the bullets fired at a target: the more bullets (or photons), the more energy your plants receive for photosynthesis, accelerating their growth. PPFD Chart PPFD charts are generally divided into two categories: those for setups with supplemental CO2 and those without it. When CO2 is added to the growing environment, higher PPFD values are recommended. This is because higher light intensity boosts photosynthesis, but only if enough CO2 and water are available to support this increased energy demand. In a typical grow room without additional CO2, plants will not be able to effectively utilize very high PPFD levels. Exceeding these levels can result in light bleaching. Therefore, the recommended PPFD levels should be lower without additional CO2. Choosing the right PPFD levels chart for your growing environment and stage of cannabis growth will maximize cannabis growth and avoid light bleaching. The PPFD map chart of the Medic Grow FOLD-1200 clearly demonstrates the variation in PPFD across different heights and areas. It also highlights the impressively high PPFD values of the FOLD-1200, with an evenly light distribution. How to Measure PPFD? To ensure that your plants are receiving the right amount of light, you’ll need a PAR meter, a tool that measures PPFD directly. Place the meter at the canopy level of your plants to check the light distribution and intensity. This allows you to adjust the light intensity, distance and positioning of your grow lights, making sure that the PPFD values match your plants’ needs. Ideal PPFD Levels for Each Cannabis Growth Stage Cannabis plants require varying light intensities during different growth stages, and the ideal PPFD (Photosynthetic Photon Flux Density) values change depending on different growth stages and whether CO2 is supplemented or not. PPFD for Seedling Stage Without CO2: 100–300 μmol/m²/s With CO2: 200–400 μmol/m²/s At the seedling stage, lower light intensity is ideal to prevent stress. Even with supplemental CO2, light levels should remain moderate to encourage slow and healthy development. PPFD for Vegetative Stage Without CO2: 400–600 μmol/m²/s With CO2: 600–900 μmol/m²/s During the vegetative stage, plants need more light for vigorous growth. Adding CO2 here can allow higher PPFD levels, accelerating leaf and stem production. PPFD for Flowering Stage Without CO2: 600–900 μmol/m²/s With CO2: 800–1500 μmol/m²/s The flowering stage requires the highest light intensity to produce dense, high-quality buds. When CO2 is added, PPFD can be significantly increased, further promoting bud growth and maximizing yield. The ideal PPFD values for each growth stage, both with and without supplemental CO2, help you create an environment where cannabis plants can thrive and yield the best possible results. How to Adjust PPFD for Optimal Growth Optimizing PPFD is key to maximizing cannabis growth and yield. To achieve the best results, there are several factors to consider when fine-tuning your lighting setup. Use High-Quality LED Grow Lights Investing in high-quality LED grow lights is essential for achieving the ideal PPFD levels without wasting energy. For example, the Medicgrow MINI SUN 320W, equipped with Samsung diodes, delivers powerful, focused light while maintaining low energy consumption. This means your plants get the light intensity they need for optimal growth, all while keeping electricity costs down. For commercial growers, products like the EZ-8 not only provide a higher PPF output than other grow lights but also come with ETL & DLC certifications. These certifications ensure that the lights meet strict quality and efficiency standards. What's more, with their professional support, you can qualify for significant rebates, allowing you to potentially purchase commercial grow lights at zero cost! This makes the EZ-8 an unbeatable choice for large-scale growers looking to boost yields and lower operational costs. Adjust the Height As the distance between the light and the plant canopy decreases, the PPFD increases. However, you need to be careful not to place the lights too close, as excessive light intensity can cause heat stress or light burn. Use Reflective Materials Using reflective materials can significantly improve light distribution. By lining your grow tent or room with reflective materials like Mylar, you can redirect stray light back onto your plants, ensuring that every part of the canopy receives adequate light. Key Factors to Consider When Modifying PPFD When adjusting the PPFD (Photosynthetic Photon Flux Density) for your cannabis plants, several factors must be considered to ensure optimal growth and avoid potential issues. Here are the main points to keep in mind. Supplemental CO2 If you’re adding CO2 to your grow space, your plants can tolerate much higher PPFD values, typically between 800-1400 μmol/m²/s. Without CO2, exceeding 900 μmol/m²/s can lead to light saturation, where plants can’t process the extra light, leading to light bleaching. Supplementing CO2 in a grow room can be done through several methods, including using CO2 tanks or CO2 bags and grow fans to promote ventilation. The optimal range for CO2 levels for higher PPFD levels is typically between 900-1000 ppm. This can be measured using a CO2 meter or monitor. Light Distribution Ensure even light distribution across the canopy. PPFD can vary drastically depending on the positioning of the lights. Use a PAR meter to measure PPFD in different areas to avoid hotspots (too much light) and shadowed areas (too little light). Temperature and Humidity Higher PPFD levels, especially with supplemental CO2, increase the plant's metabolism, causing them to require more water, CO2 and nutrients. Ensure your grow space’s temperature and humidity are properly controlled. Monitor and Adjust Gradually Sudden increases in light intensity can shock your plants. Always increase PPFD levels gradually to allow plants to adapt. Monitor the plant’s response closely for signs of stress, such as leaf curling, discoloration, or drooping, and adjust accordingly. By carefully managing these factors, you can optimize PPFD levels to suit your plants’ needs and promote healthy, robust growth throughout all stages of the cannabis lifecycle. Conclusion Understanding the optimal PPFD levels for each stage of cannabis growth is crucial for maximizing yields and quality. By reading our guide and using high-quality LED grow lights, I hope you can create ideal growing conditions and maximize cannabis yields.
Learn more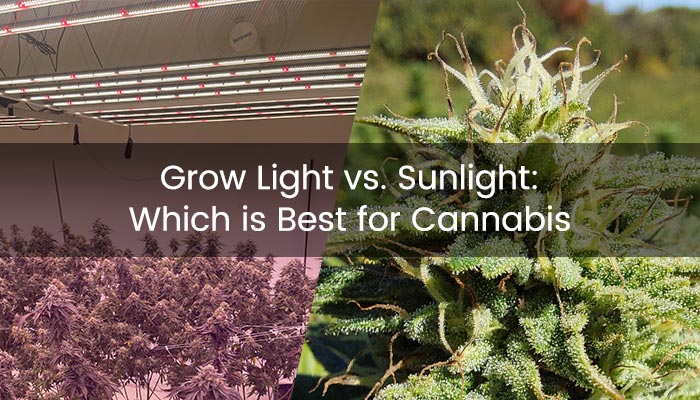
Grow Light vs. Sunlight: Which is Best for Cannabis
We all know that cannabis is a light-loving plant, requiring a high daily light integral (DLI) and PAR (Photosynthetically Active Radiation) to thrive. As indoor cannabis cultivation becomes increasingly popular, the debate over whether grow lights or sunlight is better has intensified. In this guide, we will explore the advantages of grow lights over sunlight and how you can leverage these benefits to boost cannabis yield and quality. Table of Contents: A Comprehensive Comparison of Grow Lights vs. Sunlight Do Cannabis Grow Better in Sunlight or Grow Light LED Grow Lights and Commercial Cultivation 3 Key Advantages of Medic Grow Commercial Grow Lights Conclusion A Comprehensive Comparison of Grow Lights vs. Sunlight When it comes to cannabis cultivation, both grow lights and sunlight offer unique benefits, but they also have some limitations. Here’s a breakdown of how the two compare across key factors that influence plant growth. Control and Consistency One of the biggest advantages of grow lights is the ability to control the light environment. You can adjust the intensity, spectrum, and duration of light exposure to meet the specific needs of cannabis during different growth stages. This is particularly beneficial in areas with inconsistent sunlight or during seasons with shorter daylight hours. In contrast, Sunlight provides a naturally balanced full spectrum, but it is less controllable. Factors like weather, seasons, and day length can impact how much sunlight your plants receive, making it less predictable for year-round growing. Spectrum When it comes to the spectrum, high-quality LED grow lights are designed to target the most beneficial wavelengths for cannabis growth, particularly in the blue and red parts of the spectrum. Additionally, some LED lights also offer UV and IR light, which can enhance cannabinoid production and shorten the growth cycle. This flexibility allows growers to adjust the spectrum to optimize photosynthesis at different growth stages. While natural sunlight provides full-spectrum light and is excellent for cannabis growth, indoor growers can effectively mimic and optimize specific light spectra with LED grow lights, focusing on wavelengths that promote growth and flowering and reducing energy costs. Light Intensity On a clear day, sunlight can deliver a Photosynthetic Photon Flux Density (PPFD) of 1,200–2,000 μmol/m²/s at midday. However, the intensity is unstable and varies throughout the day, influenced by factors such as weather, location, and seasons. By contrast, high-quality LED grow lights can deliver consistent, adjustable light intensity tailored to each growth stage. Grow lights offer precise control, providing stable and optimized light levels regardless of outdoor conditions. Energy Efficiency In terms of energy efficiency, LED grow lights are highly energy-efficient and consume far less power than traditional lighting systems. However, the initial cost of purchasing high-quality lights can be substantial, and operating grow lights add to electricity expenses. On the other hand, sunlight is a free and abundant energy source. Outdoor cultivation harnesses this natural resource without ongoing operational costs, but it is limited by environmental factors such as location, weather, and seasonal changes. Yield and Quality When comparing yield and quality, in controlled indoor environments, grow lights allow for year-round cultivation with optimized light cycles, which can lead to more consistent and predictable yields. By fine-tuning the light spectrum, growers can also increase the potency and quality of their crops. Conversely, outdoor plants exposed to natural sunlight can grow larger and may produce higher yields due to the unrestricted space and the natural balance of light. However, the quality of outdoor crops can fluctuate based on unpredictable environmental conditions. Environmental Factors Regarding environmental factors, indoor growers using grow lights have complete control over the growing environment, including temperature, humidity, and CO2 levels. This control makes it easier to avoid pests, diseases, and harsh weather conditions, ensuring more consistent results. In contrast, outdoor plants are subject to environmental fluctuations, which can increase the risk of pests, mold, and other challenges. However, they also benefit from natural CO2 levels and fresh air, which can improve plant health naturally. Do Cannabis Grow Better in Sunlight or Grow Light Both sunlight and grow lights can produce high-quality cannabis. Outdoor cultivation benefits from free, natural light and larger plant growth, but it is subject to environmental unpredictability. Grow lights provide a more consistent and tailored light source, allowing for year-round cultivation and precise control, which can lead to higher potency and yields. In controlled indoor environments, grow lights are generally better for consistent quality and maximizing yields, while sunlight is ideal for larger outdoor grows with lower operational costs, though more vulnerable to environmental risks. LED Grow Lights and Commercial Cultivation In commercial cannabis cultivation, whether in greenhouses or vertical farms, LED grow lights have become a key tool for increasing yields and optimizing the growing environment. These lights break the limitations of seasons and daylight hours, providing consistent light that enables year-round cultivation. This ensures that plants can photosynthesize and grow in any season. Additionally, in commercial cultivation, the light intensity (PPFD), spectrum, and exposure time of grow lights can be adjusted according to the specific growth stages of cannabis. For example, red and far-red light can accelerate the flowering phase, boosting yields and THC concentration. Grow lights like the Medic Grow FOLD-800 U1 and FOLD-1200 U1 are specifically designed for the flowering stage of cannabis. They offer optimized red and far-red wavelengths with a PPF output of up to 3600 μmol/s, significantly promoting bud development and improving overall quality. 3 Key Advantages of Medic Grow Commercial Grow Lights Medic Grow's commercial grow lights offer advanced features that help growers optimize their yields. Here are the three key advantages that set these lights apart. Spectrum Tailored for Cannabis Medic Grow Spectrum series offers an adjustable full spectrum specifically designed for cannabis cultivation. Their V1 spectrum is ideal for the seedling and vegetative stages, with a balance of high blue light and adequate red light to encourage strong, healthy growth. The F1 spectrum is rich in red light, perfect for the flowering stage to boost yield and THC levels. For even more enhanced results, the VS spectrum adds UV and far-red light to the V1, while the FS spectrum includes UV and far-red light in the F1 for maximum potency and bud development. High Energy Efficiency Medic Grow LED grow lights are highly energy-efficient, providing powerful light output while consuming significantly less power than traditional grow lights. For example, the FOLD-1200 delivers a remarkable PPF output of 3600 μmol/s, making it an unparalleled advantage in commercial cannabis cultivation. This high-intensity light output ensures that plants receive optimal light levels, promoting faster growth, larger yields, and higher potency, which is critical for maximizing productivity in large-scale operations. Free Grow Lights Through Rebates All Medic Grow commercial grow lights are ETL and DLC certified, which means growers can qualify for massive rebates when purchasing these LED grow lights for commercial use. With Medic Grow's support, you can get high-quality grow lights for free in bulk, allowing for a cost-effective way to scale up your commercial cannabis cultivation. These benefits make Medic Grow Lights a top choice for commercial growers looking to optimize their yield, improve product quality, and minimize operational costs. Conclusion Both grow lights and sunlight have their advantages. If you're looking for year-round control, higher yields, and optimized growth conditions, high-quality LED grow lights like Medic Grow offer unmatched flexibility and performance. By effectively using them, you can ensure consistent, high-quality results.
Learn more